
Request Tracker's primary search engine is called "Query Builder" and you can find it in the RT menu at Search > Tickets > New Search, or on older RT's Tickets > New Search. It lets you find tickets matching some, potentially very complex, criteria. You can search against all of the metadata RT stores on tickets, so there are loads of criteria you can specify in order to perform a search. In this intro to the Query Builder we'll describe strategies for narrowing your searches to find exactly what you're looking for, and no more.
To follow along with the examples below, you can log into your RT instance or go to https://issues.bestpractical.com and try the searches yourself.
To start, let's look for tickets in the "RT" queue, RT's bugtracker for itself, that have been resolved in the last year. To do that, we specify the following search criteria: Queue = RT, Status = released, and Resolved Date after 2015-06-01) in the upper left hand section of the Query Builder.
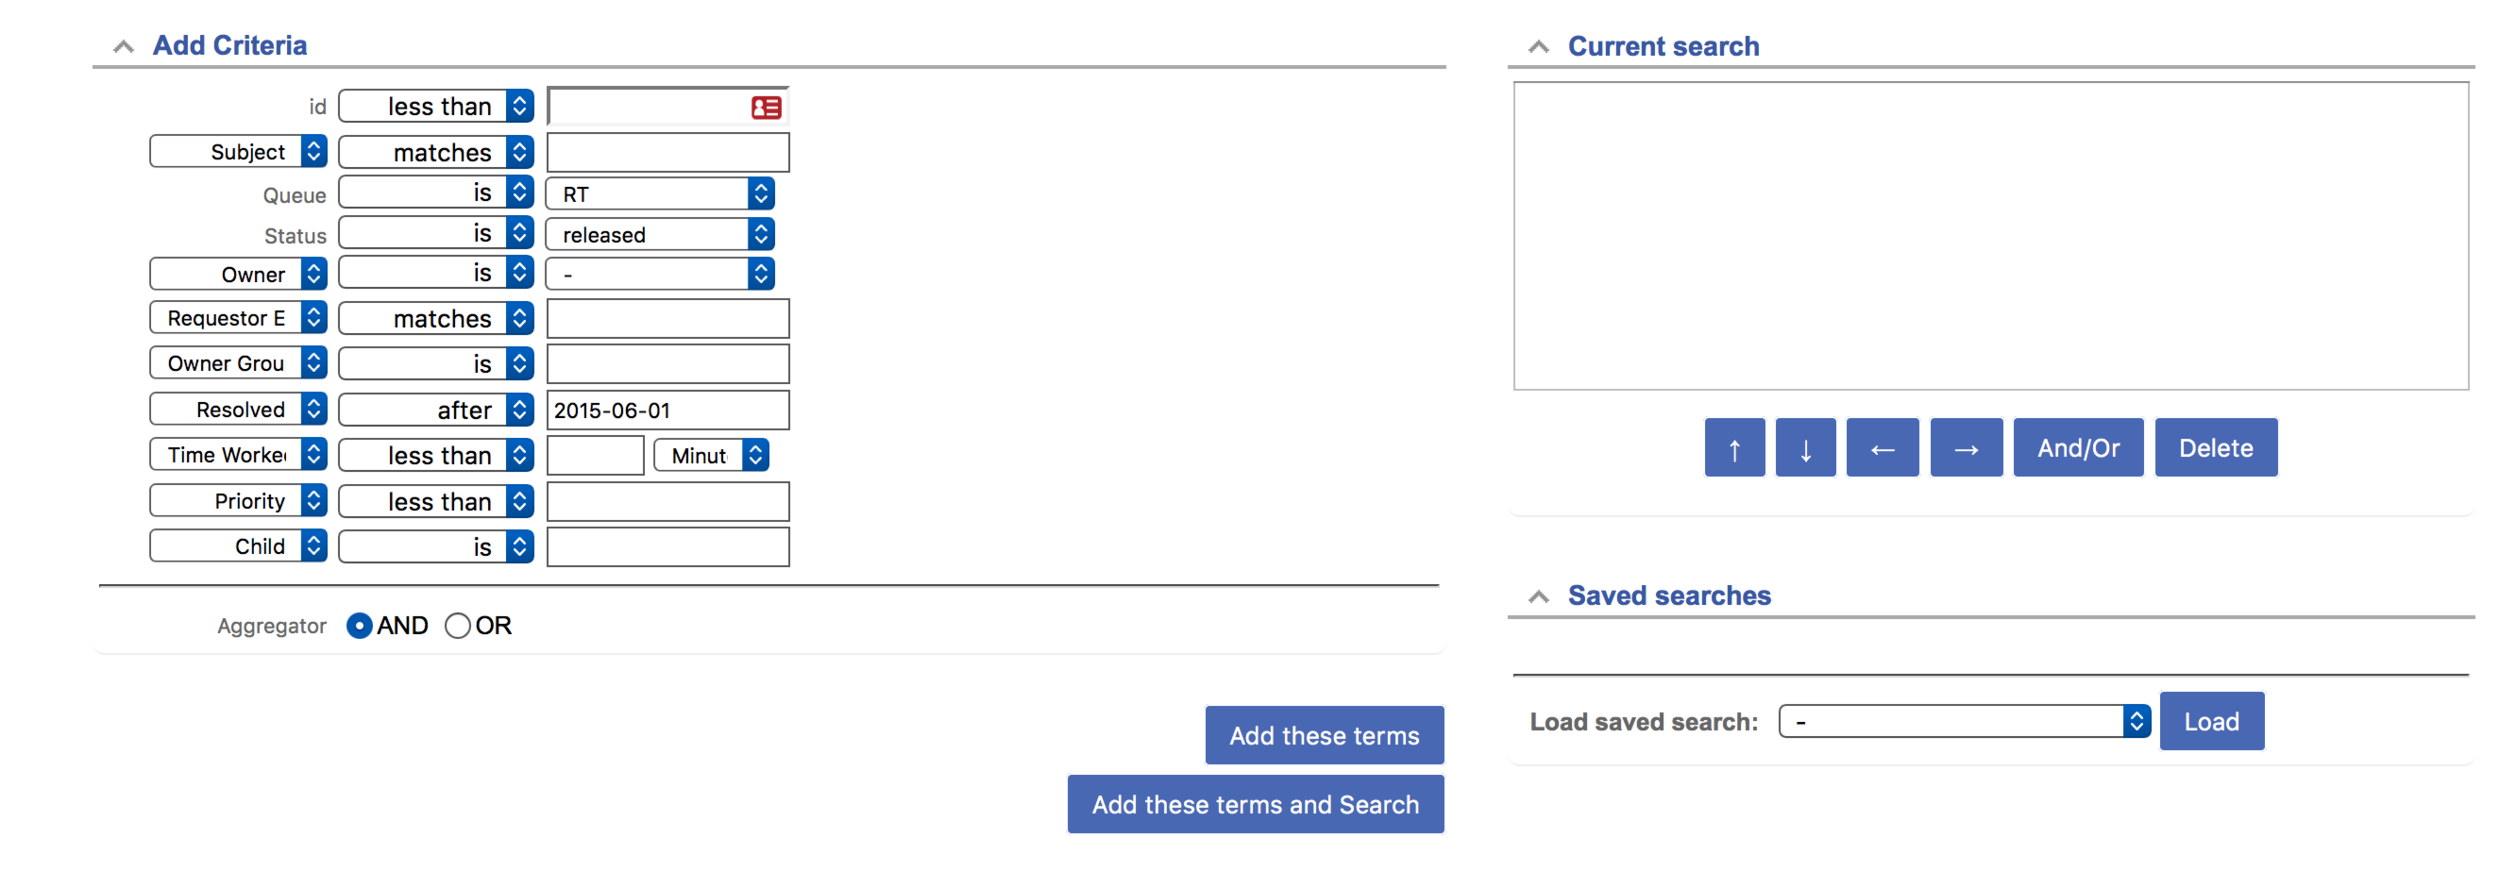
Notice that the status dropdown shows different sets of statuses for different lifecycles configured in Request Tracker. In our case, we have a custom lifecycle for RT tickets that follows the steps we take when releasing new code including review, merge, and release. Your RT may have the default new, open, and resolved or some other custom statuses.
Now that I've selected some criteria, I can click either Add These Terms or Add These Terms and Search. I'll click the former:

The upper right hand side now presents all the logic we've specified. This view is a nice way proofread your search. Have you captured everything you want? Are there things you'd maybe prefer to leave out for now?
You'll also notice that the list of criteria has changed now that we have selected a queue. Now that RT knows which queue we're interested in, all custom fields that are applied to the 'RT' queue now appear at the bottom. If I wanted to generate a report related to one of these custom fields or just use one as a filter, I could now add that to my search.
It turns out I've changed my mind. I actually don't want to restrict the search to just the RT queue. I want to see all the tickets in issues.bestpractical.com (which also includes feature requests, RTIR, etc.) that have been resolved within the past year. To adjust the search, I can click on 'AND Queue = RT' and press Delete:
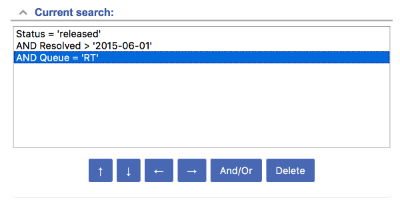
My search now looks like this:

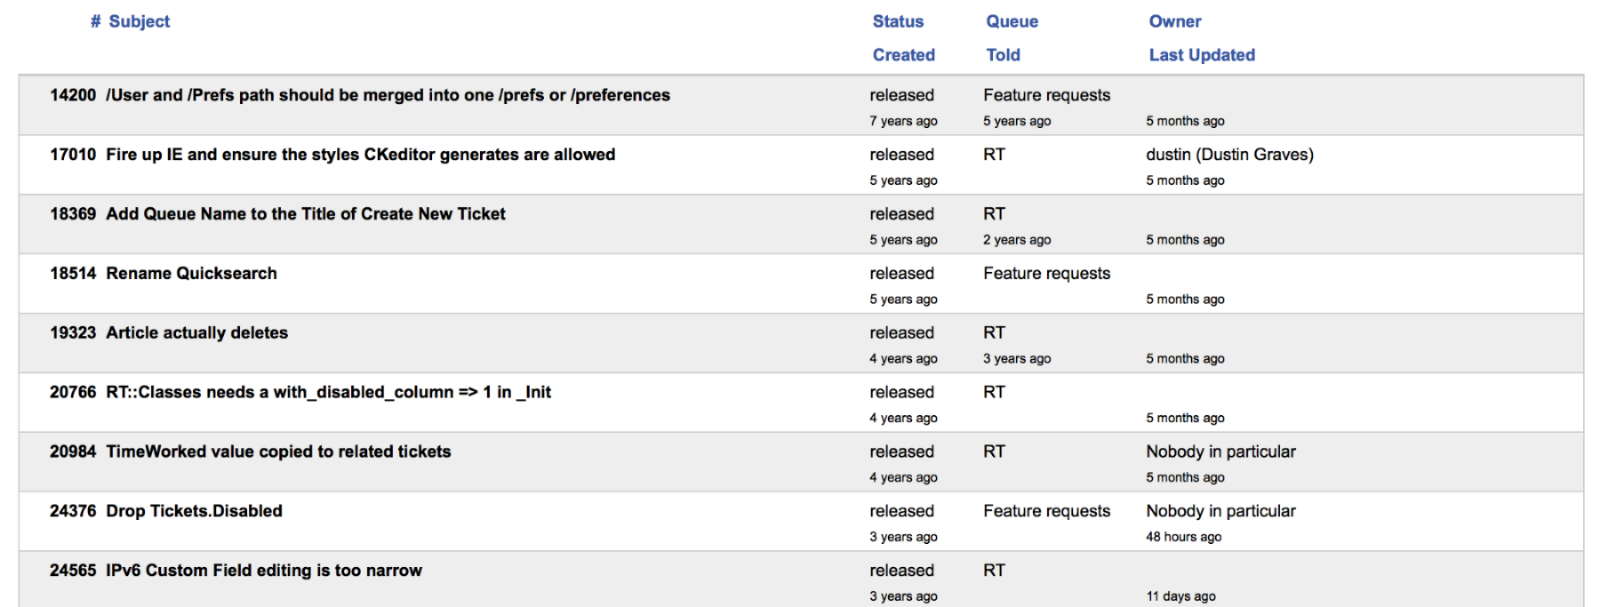
Finally, to execute the search, I can either press 'Add these terms and Search' (provided there's no new content in the Query Builder), click on the 'Show Results' link in the submenu above, or scroll all the way down and press 'Update format and Search'. This search should turn up a full page of tickets. Here's the top portion of the list:
This is the default view of your results. However, like nearly everything in RT, it's configurable. You can select additional columns to appear in your results, eliminate columns you don't find useful, or reorder them. To start, notice that at the bottom of the query builder page there are two panes: Sorting and Display Columns.
There is more than one option for Sorting so that you can break apart tickets with the same search values into a meaningful order. For example, let's say you start off by sorting tickets in a search by their owner. Since you've only specified to sort by owner, RT doesn't order the tickets owned by the same user in a meaningful way. This is where the multiple sort criteria comes in handy. You can use a second sorting criteria to sort within the set of tickets owned by a single user. For example, you could add a sort by due date to see tickets sorted first by owner, and then tickets with the same order are ordered by due date.
We'll update the search to sort by Created, ordered with newest first (descending), then by id. We'll also add Resolved (date) and Queue to the columns shown in the results.

The Display Columns tab allows you to add or remove information displayed in the results of your search. To pack more information on each line, RT stacks some data like Subject and Requestor. To create the same effect as you add new columns, position them on either side of the NEWLINE line break. NBSP adds an empty column such as what shows up under id (#) in the default search.
Here is the search result page.

Notice that the structure of the data that's displayed is stacked: Status on top of Created, etc. Since we're displaying a lot of information (10 fields for each ticket), having the NEWLINE is important for the results more comprehensible.
That covers the basic use of the query builder! Request Tracker's documentation has more information on building dashboards for reports, dashboards in general, and charts. Stay tuned for more blog posts to help you get the most out of RT.